Navigation
Using the map and GPS tracking
Open the map from a walk record
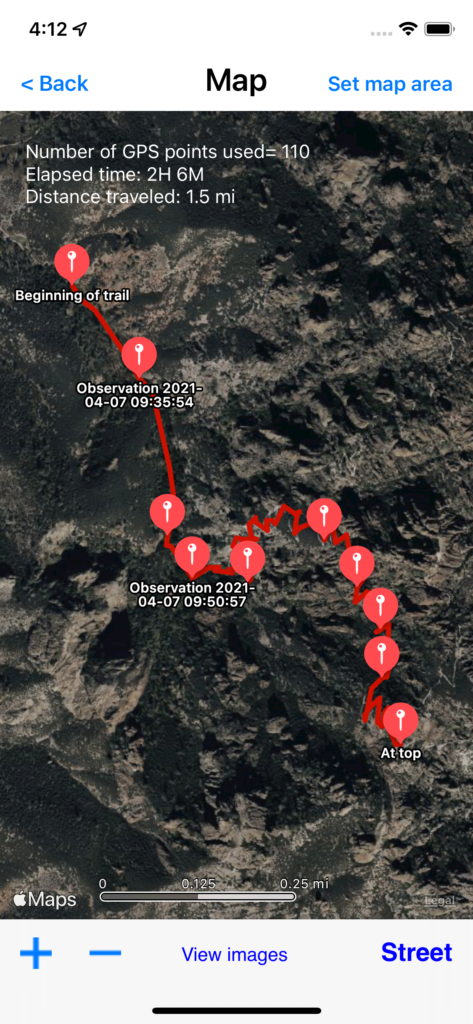
The map shows the track NatureNotes has recorded, markers showing positions of any observations, and your current position if it is within the map coordinates.
Selecting Satellite replaces the street image with a satellite image.
The satellite image can show tracks and other information that the street image doesn’t reveal.
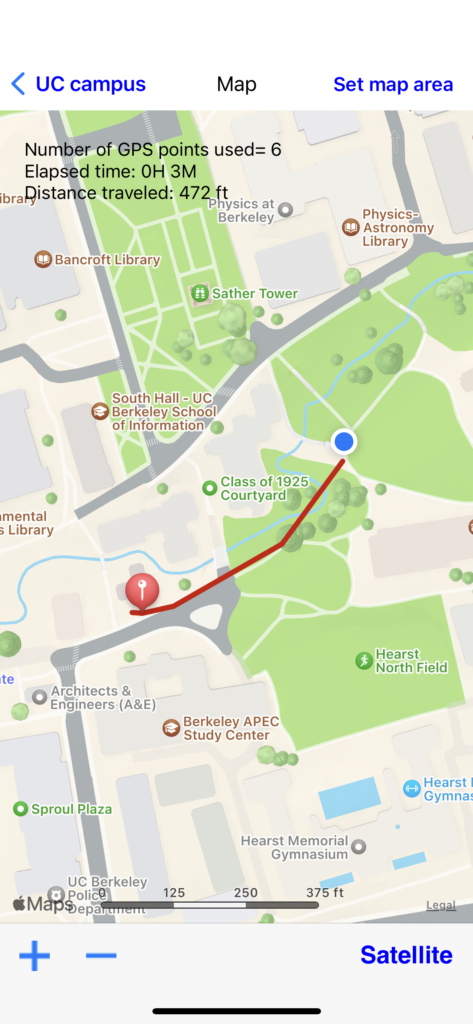
Showing your position
If you’re actively recording a walk your own position will be shown by a blue circle.
if you’re not in the picture, so to speak (as with the prior examples of a walk at Pinnacles National Monument), there will be no blue circle.
Showing your current position on all maps (even ones already recorded) has two benefits:
- First, you can’t get lost. If your position is always shown relative to the track you’re making, you can always find your way back to the starting point.
- Second, if you’re going back to a place you had previously recorded, you can open the prior walk record (even if you’re actively recording a new record) and find the exact locations that you had visited.
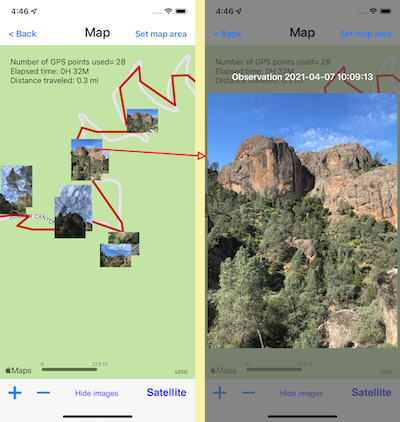
View images
Select View images at the bottom of the screen to place photo thumbnails from all the observations on the screen. The more photos you’ve taken the longer this will take to process.
Tapping on an image will expand it so you can see where you made an observation on the track.
If there are overlapping images you can expand the view to move the thumbnails apart.
Tap on the expanded image to make it revert back to the thumbnail.
Restricting the track
It’s possible the track that was recorded extended farther than you would like. For example, if you forgot to turn off NatureNotes after a walk, the track going home will probably be useless.
By expanding the walk to isolate the part of the walk you want to include, then by selecting Set map area, you can define the set of GPS coordinates you want to remain active.
Select Set new area.
Note that one of the options under Set Map Area is Undo constraints. This lets you go back to the original map at any time, without having lost anything.
Another way to edit the track
Track options from the walk menu provides a way to hide individual GPS points.
Select Track options, then Edit track.
The Edit track option displays a map of the track and a full list of the track coordinates at the bottom of the screen.
Selecting a checkbox in the coordinate list hides the corresponding coordinate from the map. Up and down arrows allow selection or de-selection of all coordinates above or below a point, starting with the selected point. The map interactively updates to show the active coordinates.
Tapping a point on the map will scroll the list to the corresponding coordinate. If the point is within the currently selected map area it will show a blue circle at the selected point.
Selecting the active map area through the Map (not the Track edit interface) is by far the easiest way to restrict the map display. The editing interface is provided as a finer-grain method for those who wish more detailed control over the track record.