Adding external images
Placing external images into a walk record
What are external images?
If you’re taking pictures with another camera while you’re using NatureNotes, you may want to merge some or all of the pictures into the corresponding NatureNotes walk record.
If you use another camera app inside your device to take pictures these are NOT considered to be external images. They would typically be imported into NatureNotes using the +Library images function in the observation pages.
First copy the images into a folder
The photo files must be placed inside a folder to be recognized by NatureNotes.
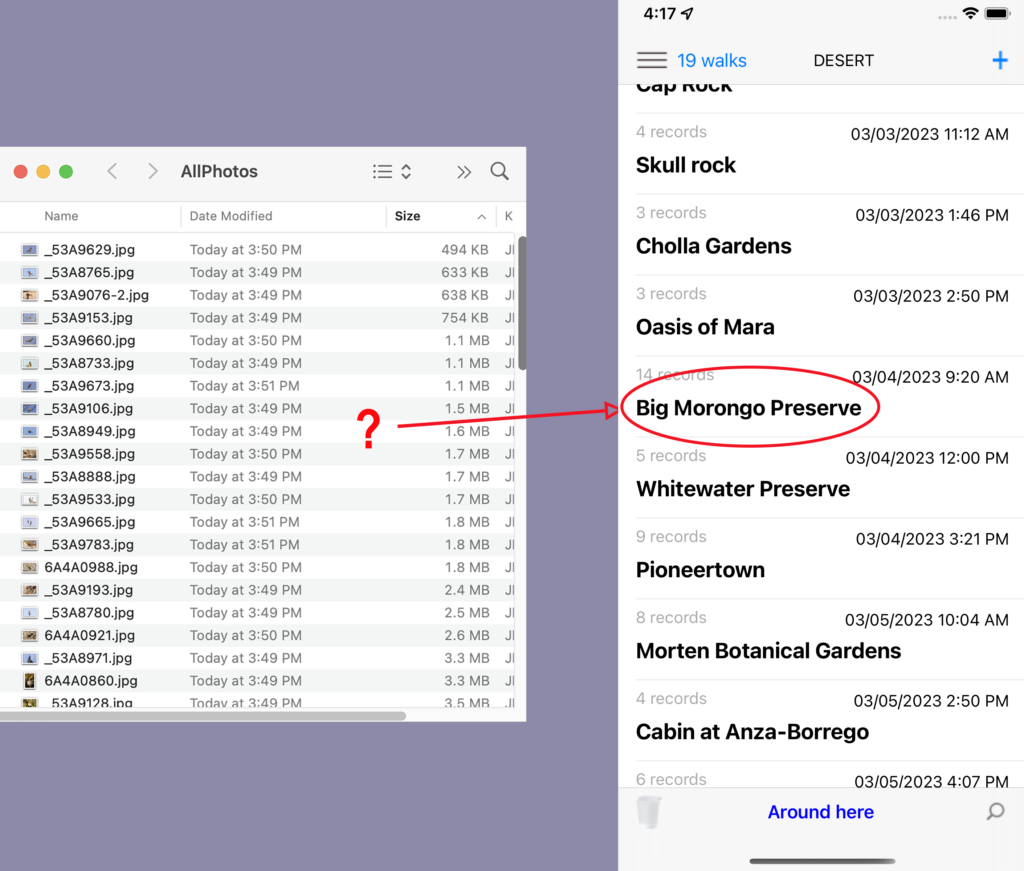
The example to the right has a set of 81 jpeg files taken on a trip to Joshua Tree in Southern California. The goal is to transfer all relevant images into the Big Morongo Preserve walk record. We don’t actually need to know which images need to be copied, since NatureNotes will filter them out for us.
Filetypes other than jpeg must be converted to jpeg for NatureNotes to recognize them as valid images.
Set up the import
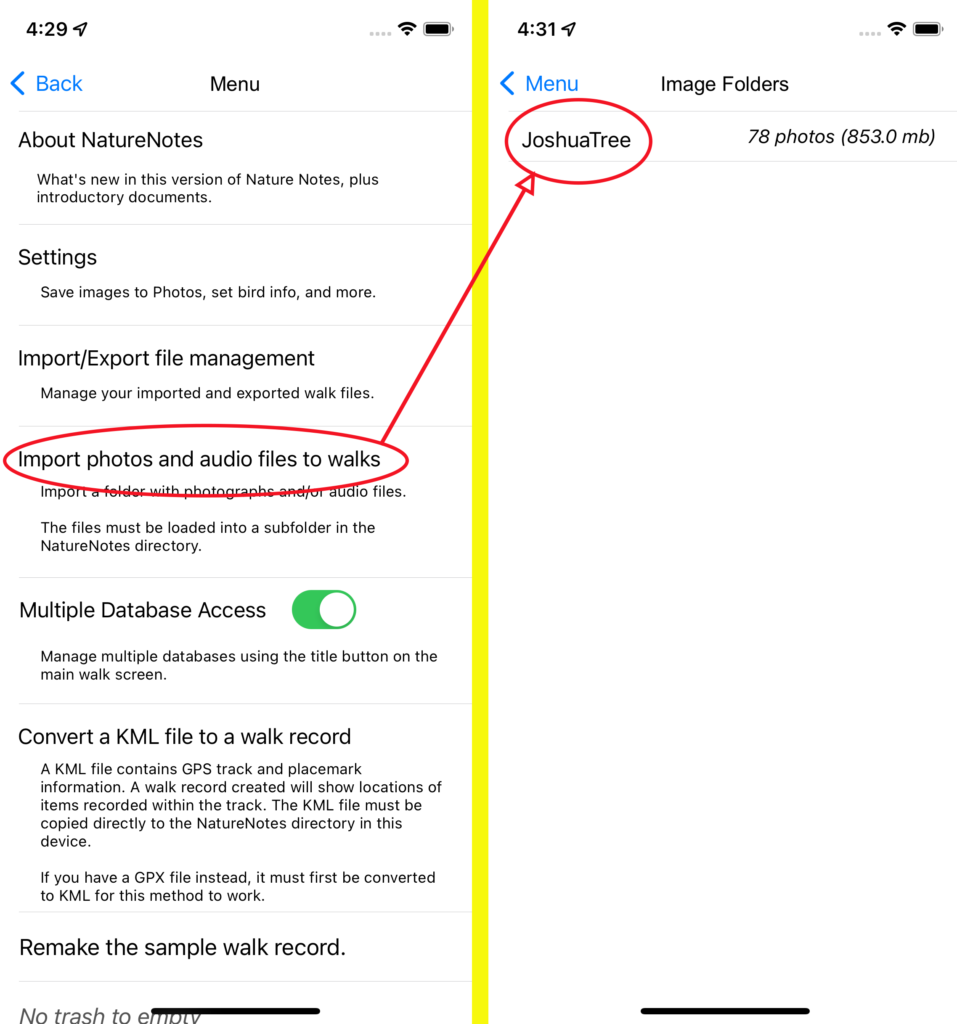
Click on the folder to import.
It’s possible to import photos without an existing walk record. But we want only to import into Big Morongo Preserve. Therefore select Distribute into existing walks.
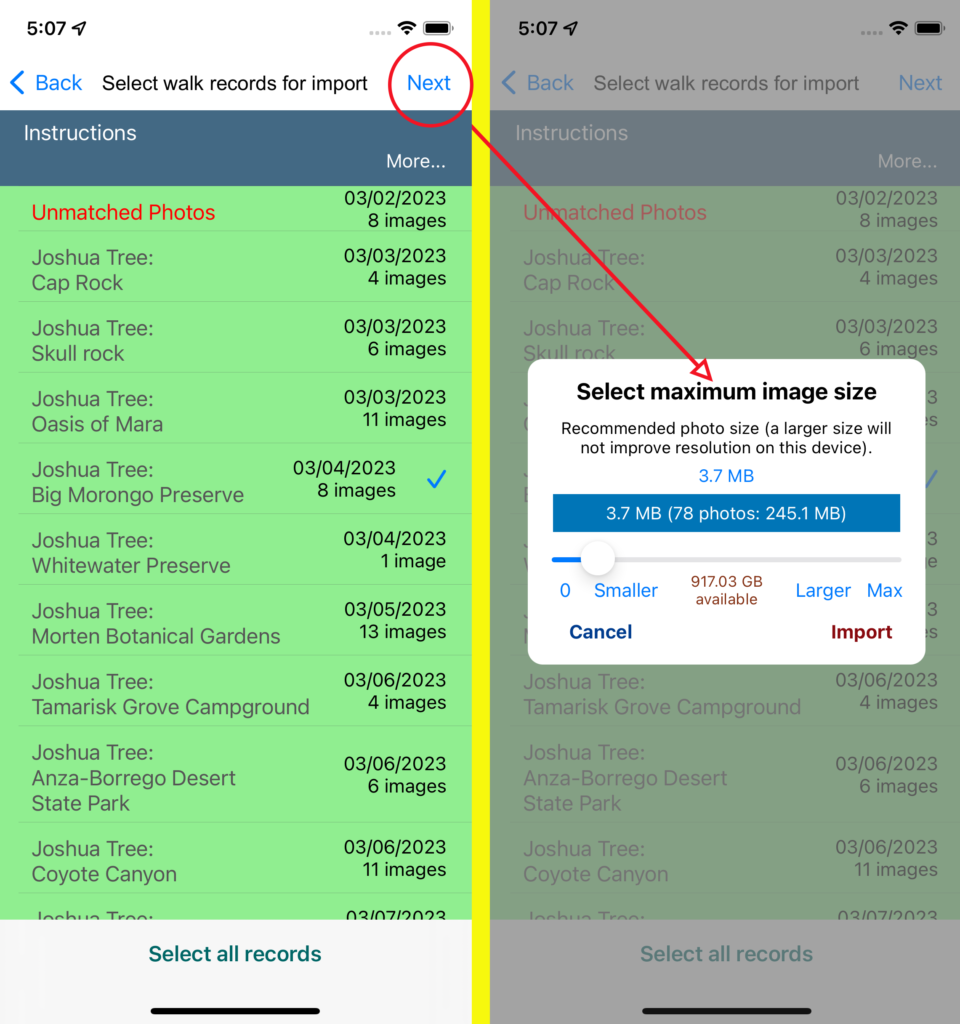
The next screen lists all walk records that are compatible with the set of photos. The photos were matched with the GPS track recorded for each walk to determine which ones “fit” within each walk record.
Because we’re only importing into Big Morongo, first de-select all of the records.
Now re-select Big Morongo Preserve.
Then press the Next button in the upper right corner. An option to select image size appears.
Image size is important in two respects: First, images are large, and they can quickly overwhelm storage memory. Second, images that are too small won’t look good on the screen, and won’t transfer well to larger screens if necessary. You can import a full-sized image but it probably won’t improve the resolution on the device.
Select import to start the import process.


