Get started
Learn the basics of recording
Create a new walk record
- Click on the plus sign in the upper right corner of the screen.
- Select Walk Record.
- Type in a walk name then press Save.
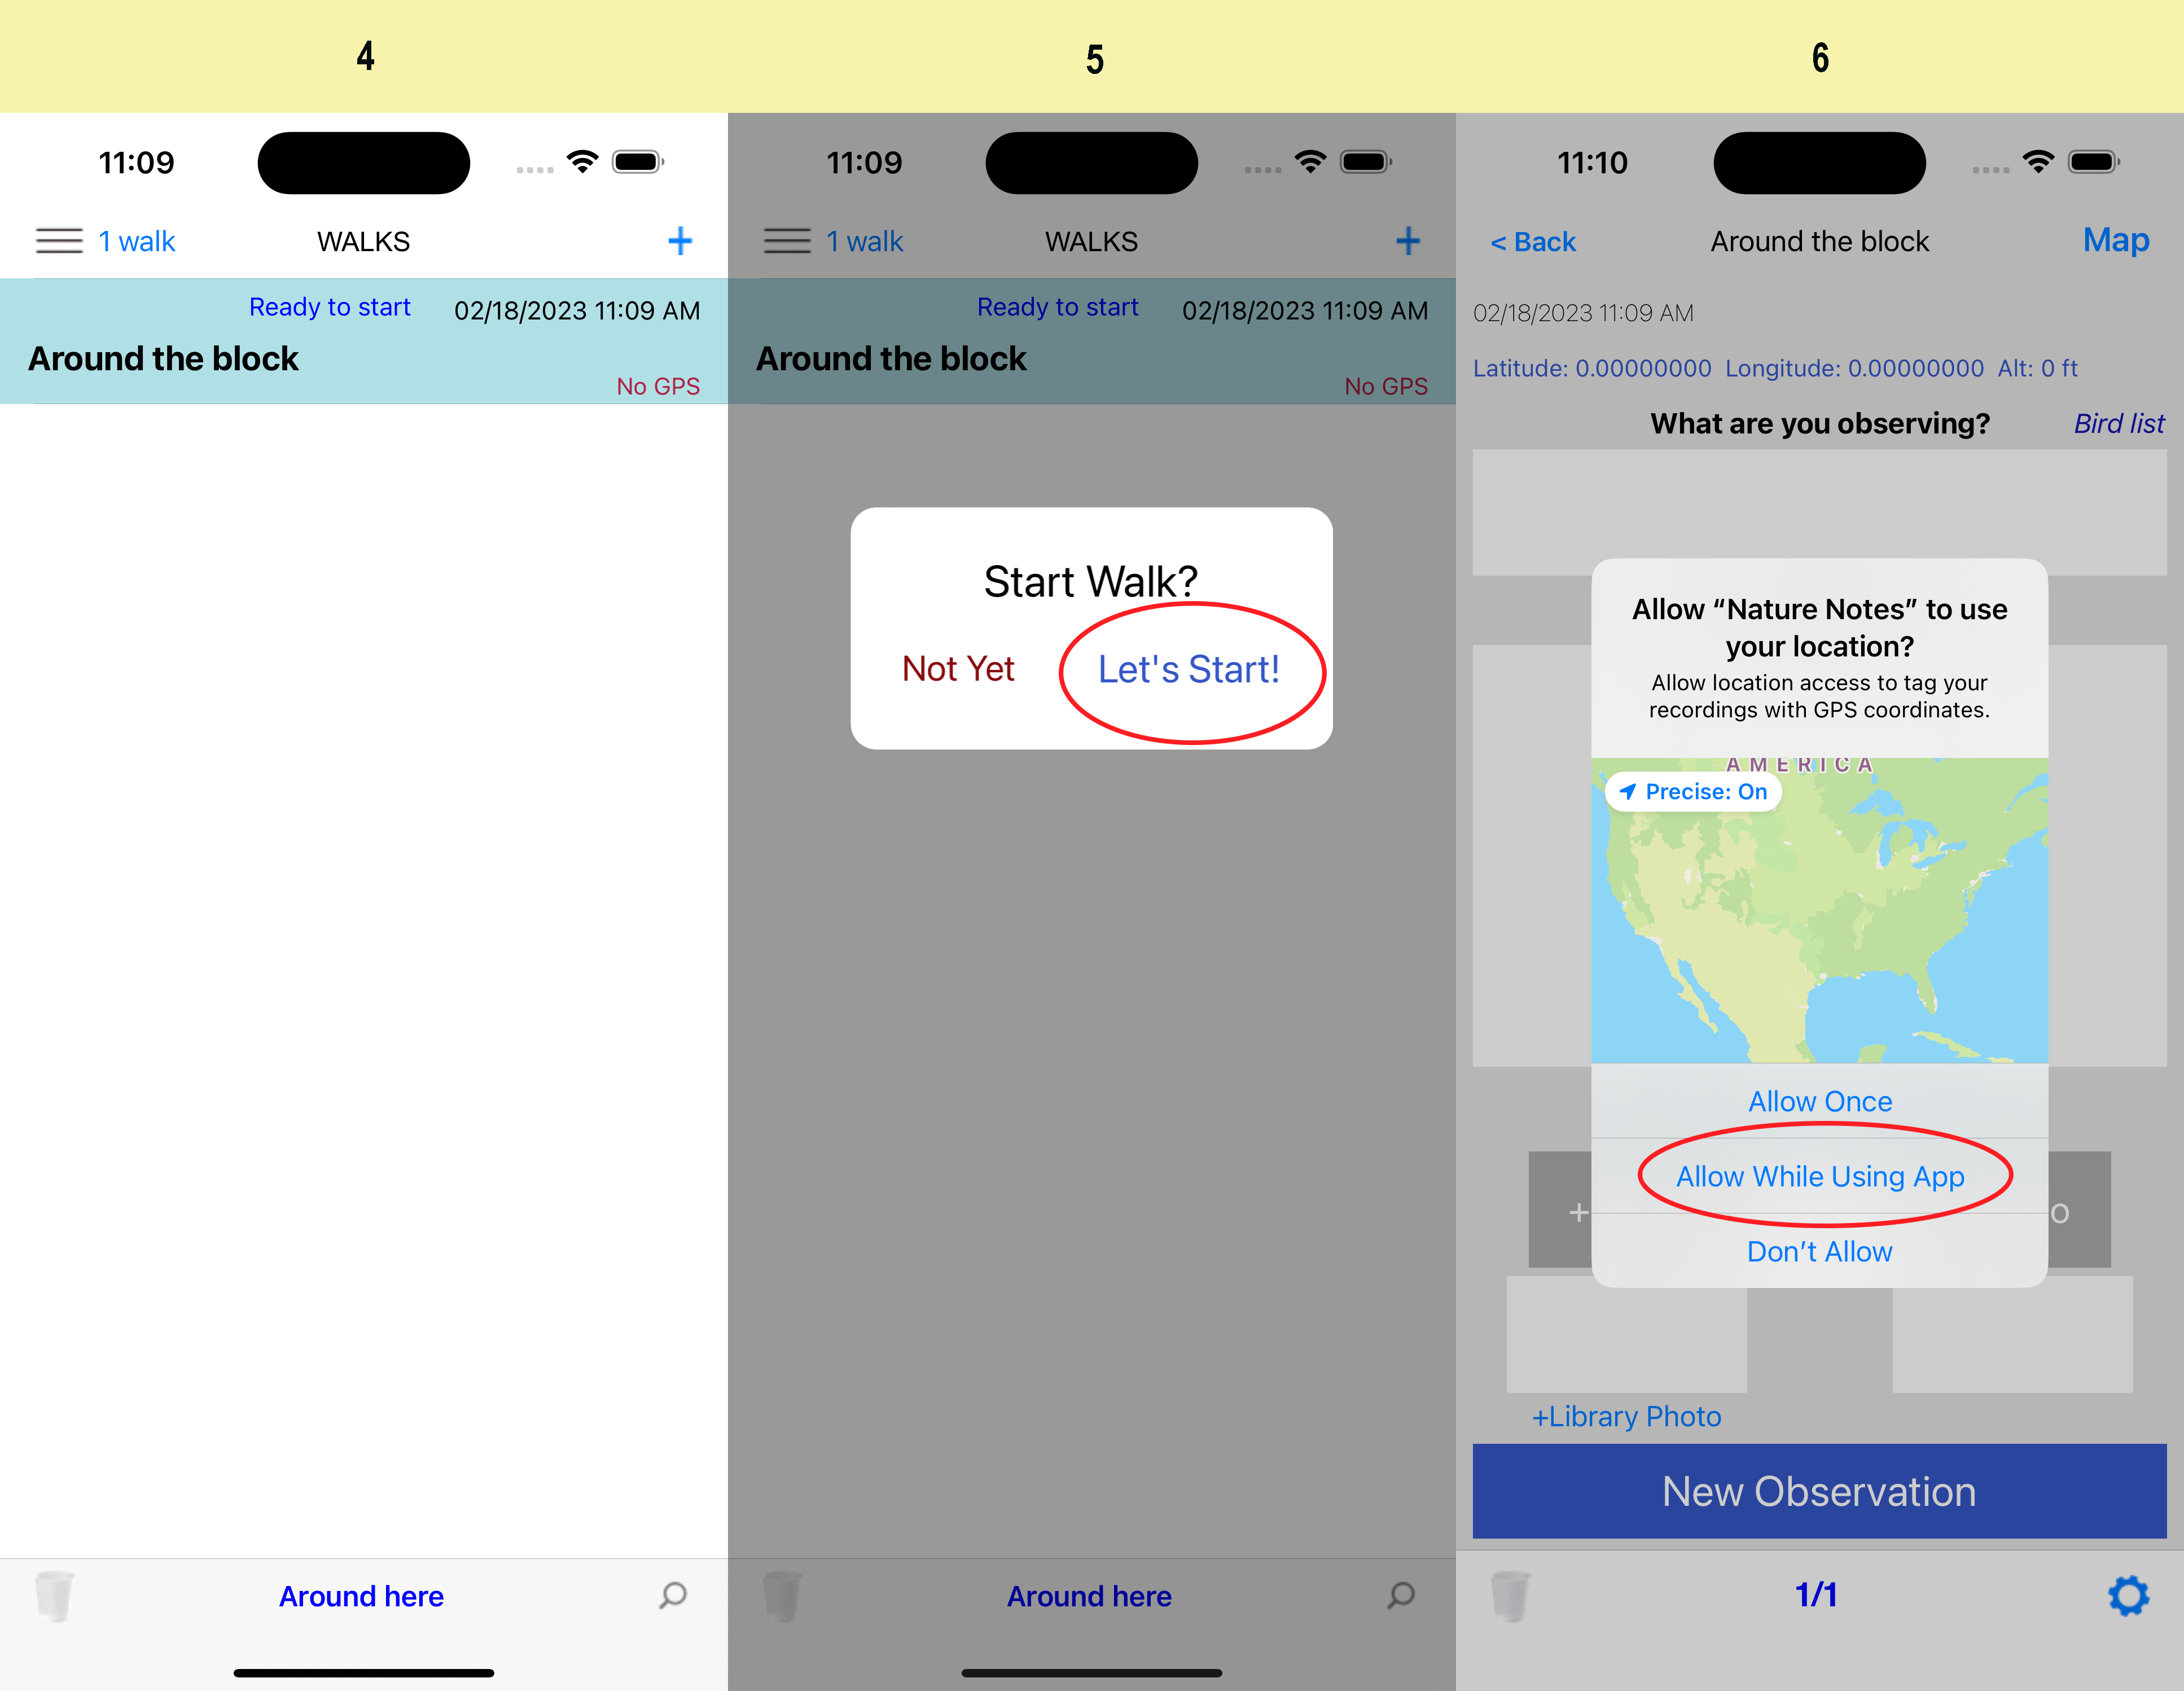
- Select the new record.
- Click on Let’s Start.
- Unless there’s a specific privacy reason for rejecting GPS tracking, it’s always good to have it on, so generally select Allow while using app.

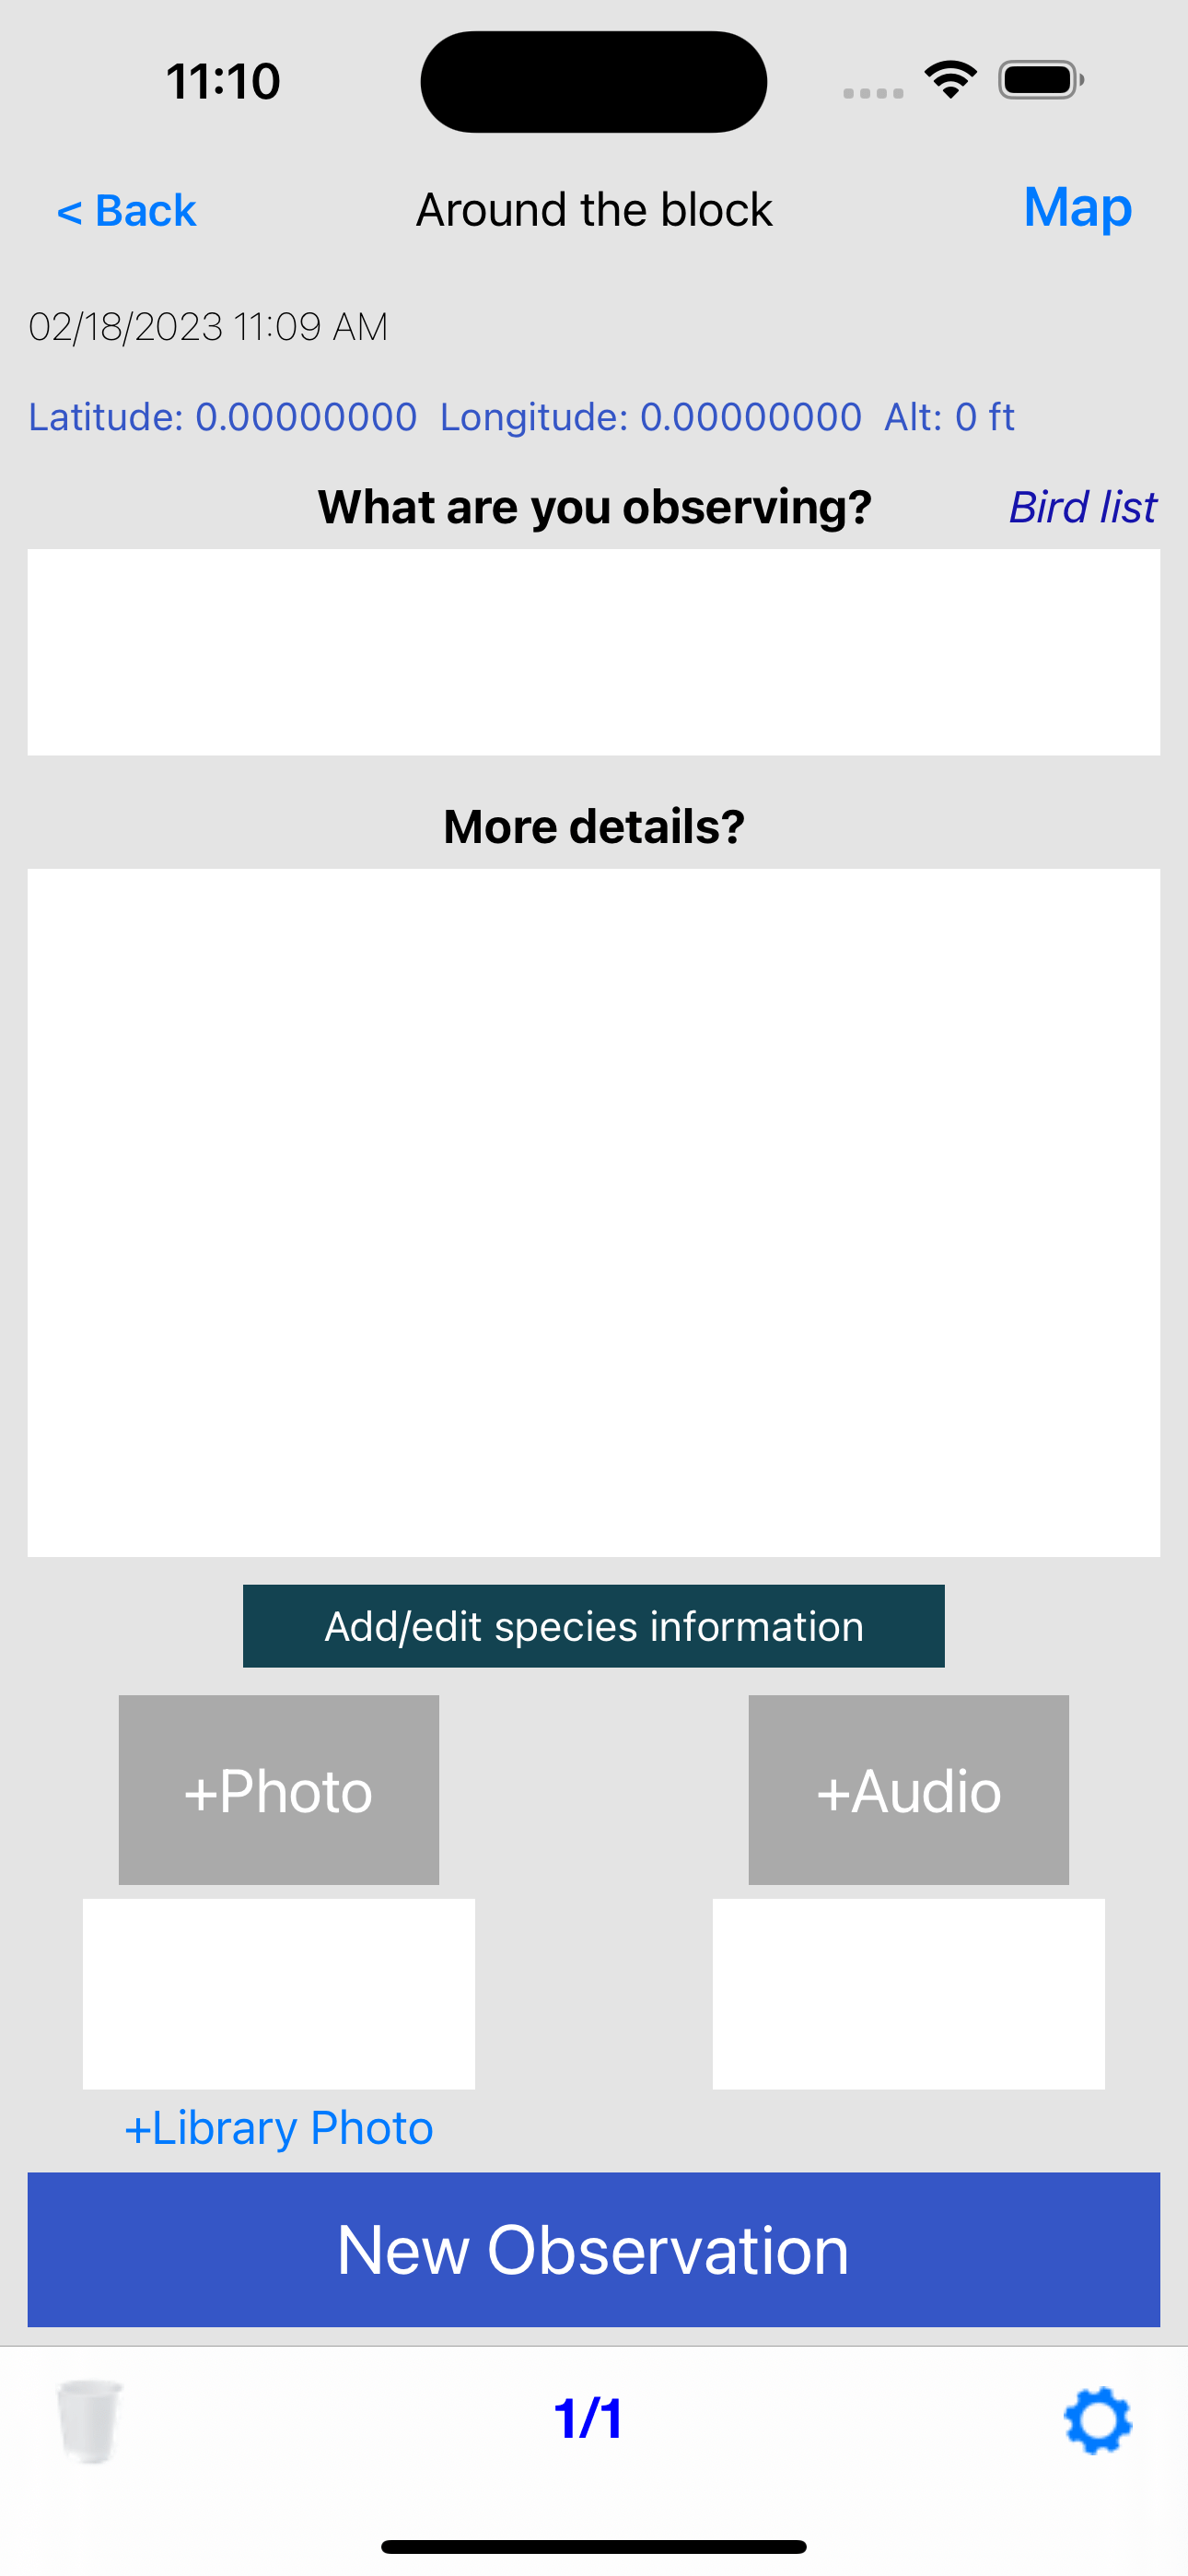
The first observation screen
Once the walk record was activated, GPS track recoding started (assuming you allowed NatureNotes to use locations).
The first screen is empty. It will receive your first observation. The observation may be text, and/or one or more photographs, and/or one or more audio recordings.
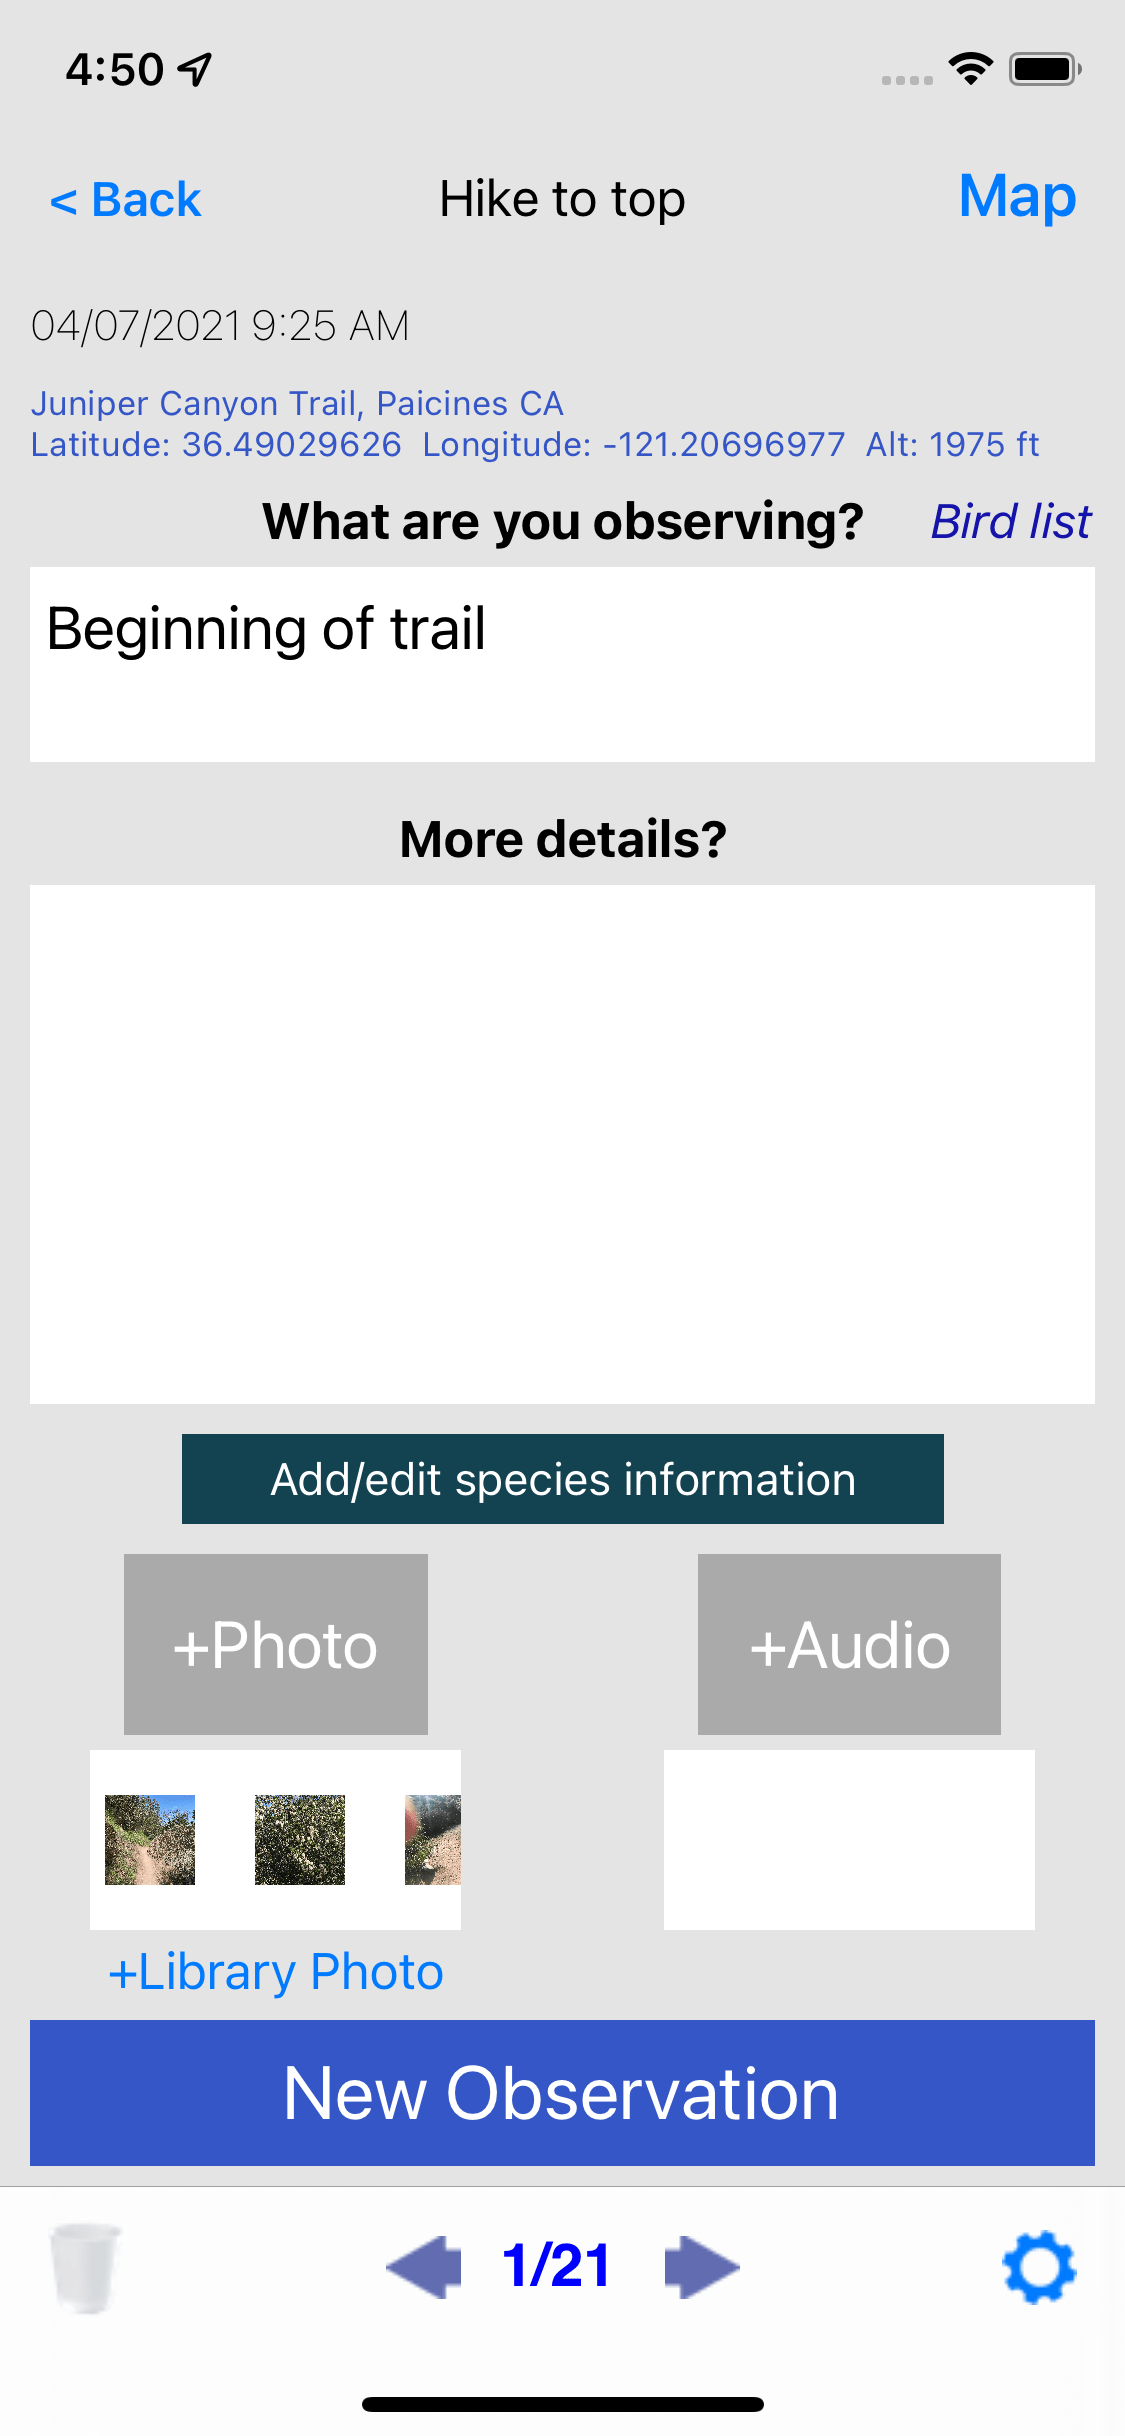
Make an observation
A typical observation consists of a notation and one or more photographs.
Thumbnails of photographs taken within an observation will appear under the +Photo button. Similarly, any audio recordings will be listed under the +Audio button.
Once you’ve finished an observation, click on New observation to create a new entry screen.
Remember that an observation is about a specific object at a specific location. If you take pictures of two different species of plants, for example, in one location, then two observations should be created — one for each species. But multiple photos of one plant should be nested in one observation record.
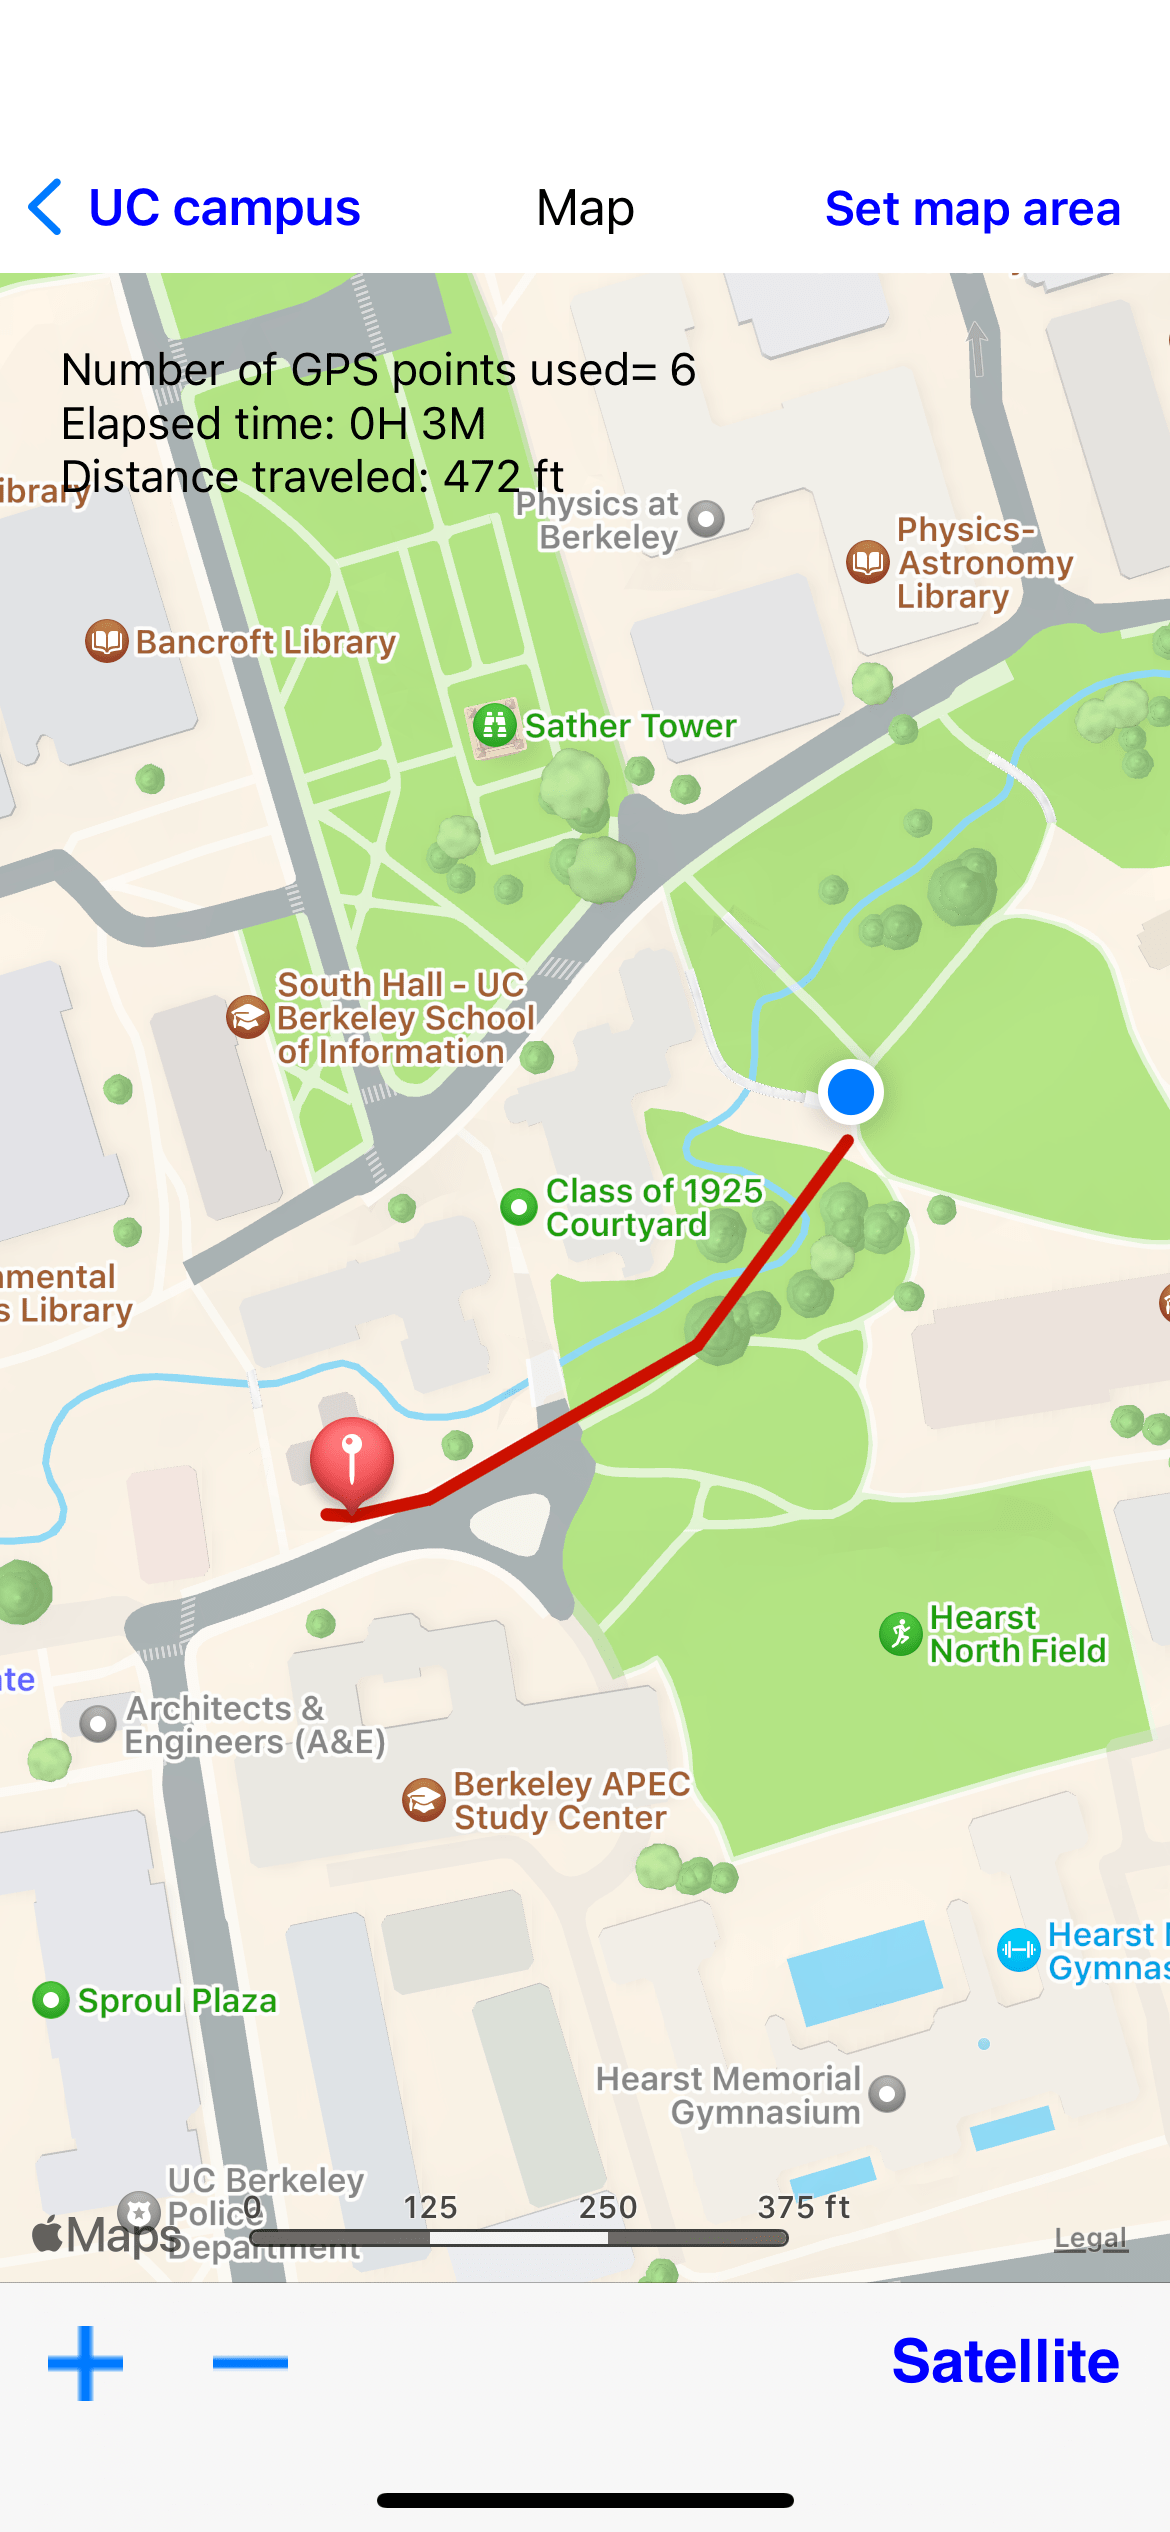
Where are you now?
The track and your current location on the track is always available in the Map window.
Your current position is shown by the circular blue marker.
Note that you can use the map to retrace your steps if you ever become lost! Just move until the blue marker moves toward your prior track or starting point.